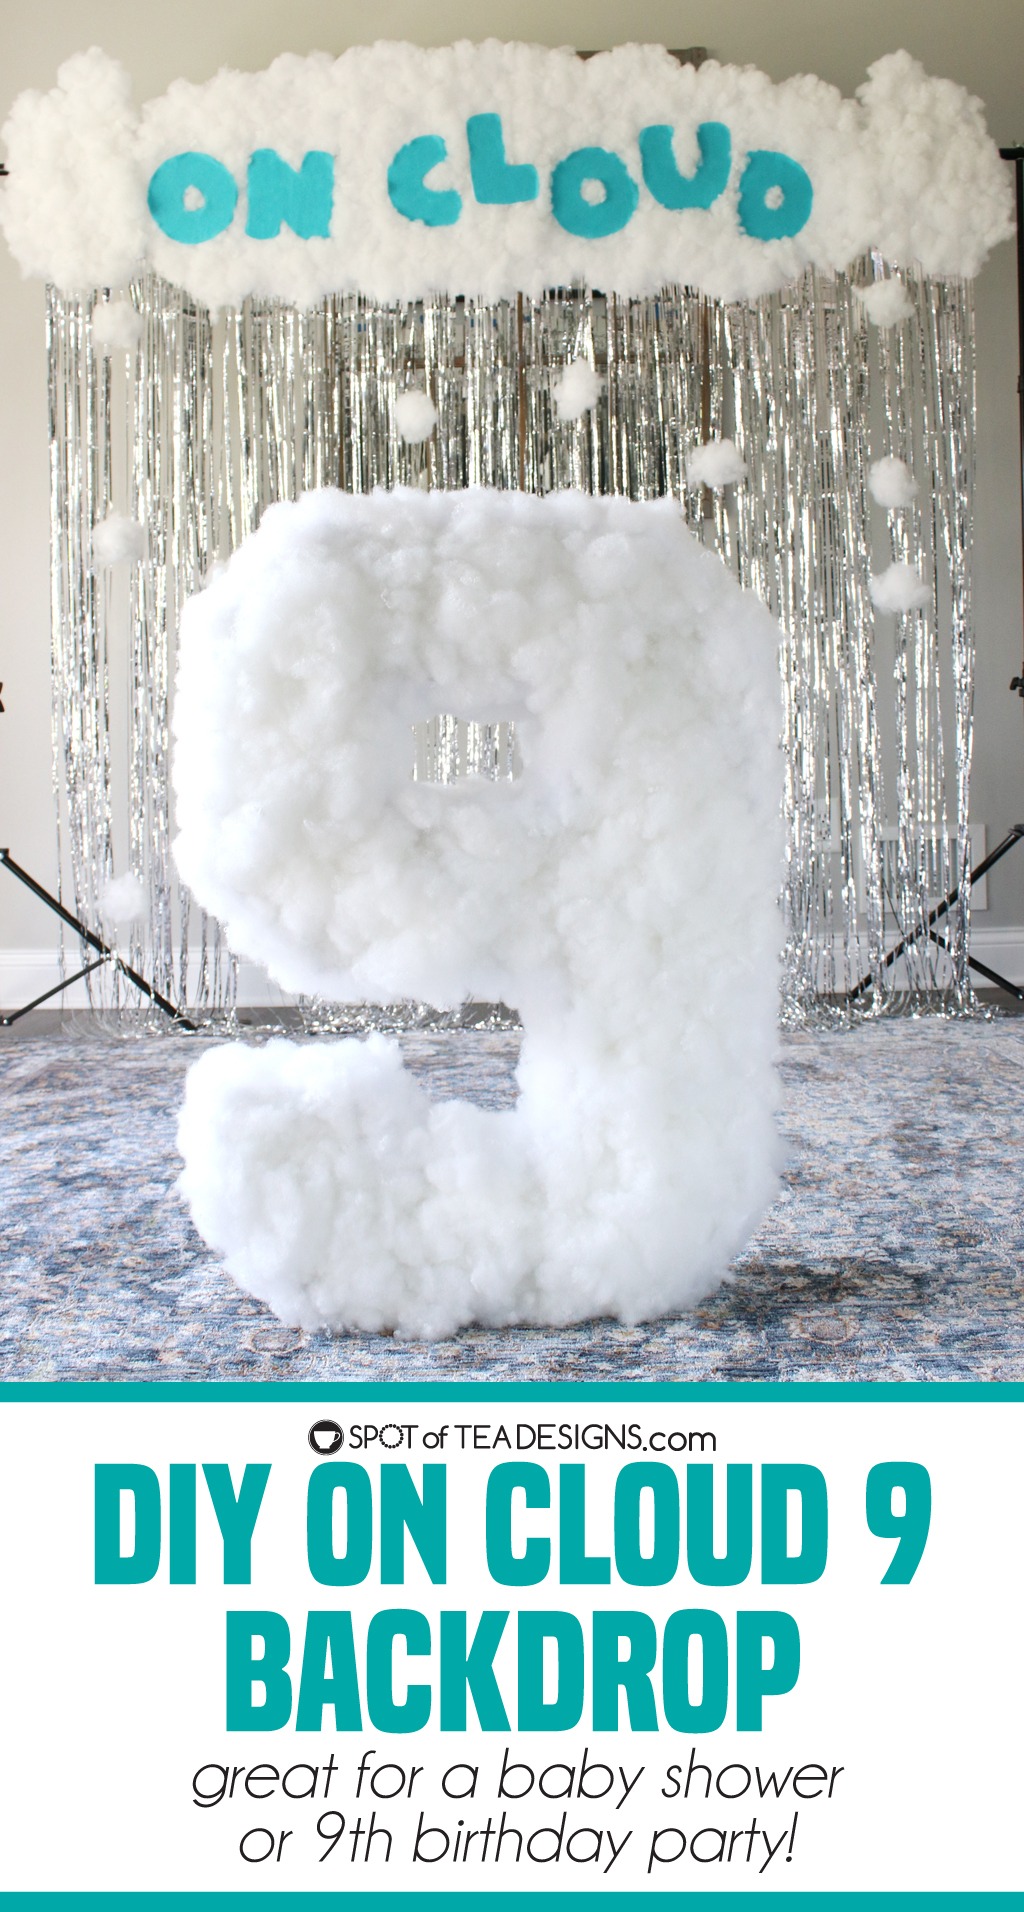
When it comes to party hosting, expanses can add up fast. Take the time to make your own decor, that can save you some dollars to put towards food and drink. Learn how to create this On Cloud 9 DIY Party Backdrop following my step by step photo instructions to stage at a baby shower or 9th birthday party!
DISCLOSURE: I was compensated with a product sample by Fairfield World, but the opinions are all mine and not that of the company! In addition, some of the links in this post contain affiliate links, which come at no cost to you. Know that I only promote products I personally use and stand behind. To learn more about my affiliates, please review my disclosure policy.
I LOVE me a fun DIY party backdrop that helps to make photo sessions with friends pop! This one is not only a neutral color (white!), it fits the fun baby shower or 9th birthday party theme, but it also is FLUFFY! Yes, thanks to my friends at Fairfield World, I received a large box of their fluffy Poly-Fil Polyester Fiber Fill that was used to create all the fluffy backdrop components and large self standing foam board 9 seen in this photo op.

On Cloud 9 Party Backdrop Supplies:
- Poly-Fil Polyester Fiber Fill
- On Cloud Free Printable Template
- Large Foam 9 Printable template
- 20 x 30″ Foam Boards
- Glue gun and glue sticks
- Foam Balls
- Blue Felt
- T-square Ruler
- Pencil
- Backdrop Stand
- Zip Ties
- Fishing Line
- Craft Knife
- Silver Metallic Curtains

First, let’s make the “On Cloud” backdrop component that will hang on the backdrop stand, behind the party guests. Cut 3 pieces of foam board into cloud shapes, as shown.
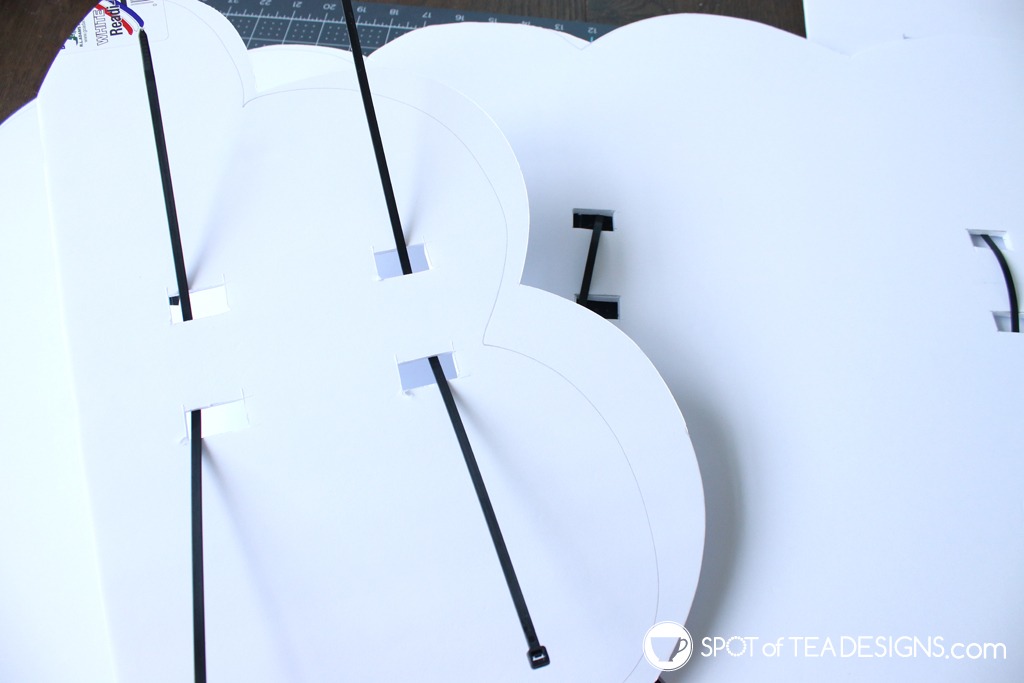
Just like I had done with the Run for the Rose 40th birthday backdrop I created for a friend’s party, I thought ahead and created these zip tie holes in my board and prepped with long zip ties so they can be hung later on party day.

Next cut out the letters from the “On Cloud” template. Trace these letters onto blue felt to make them appear more fluffy. Trace them again onto more foam board to help create a layered effect once mounted. Cut out all these components.

Attach the “on cloud” phrasing to the cloud shaped boards, as shown. Tip: I used scraps of foam board to lift the letters higher off the board as risers.

This allows you to hot glue on tufts of clouds made from balls of Poly-Fil. Make sure to fully cover all the white cloud shaped boards to create the cloud effect.

Thread a piece of fishing line through a foam ball, making a knot to secure it in place. Glue more Poly-Fil onto the ball to create a small cloud effect. Repeat to create a string of 2-3 clouds. Repeat to make additional strings.

On party day, hang your “On cloud” Poly-Fil covered foam boards onto your backdrop stand, tightening the zip ties you set up in that earlier step.

Hang silver metallic curtains and the strings of white clouds as the full backdrop design.

Next, let’s create the large foam number 9. You’ll be following the same steps I shared in my original DIY Foam Board Number board post, but this time you can follow my free large foam 9 template as a guide!
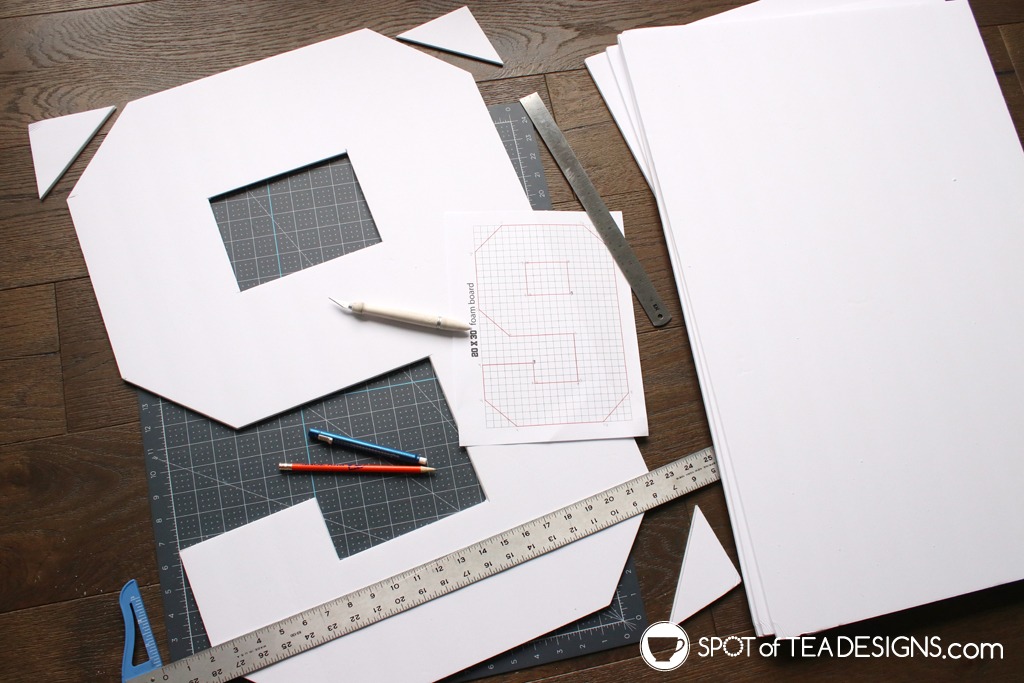
I sized this template to fit the 20×30″ foam board sheets I buy at Dollar Tree. You can see the rough idea on how to create this 9 shape using a t-square ruler, pencil and craft knife.

Cut 4″ long strips of foam board to glue along all sides of this number 9. Use hot glue to secure these components together to create a dimensional 9.

Ball up little tufts of Poly-Fil to once again create a better surface shape to glue onto your foam number 9.
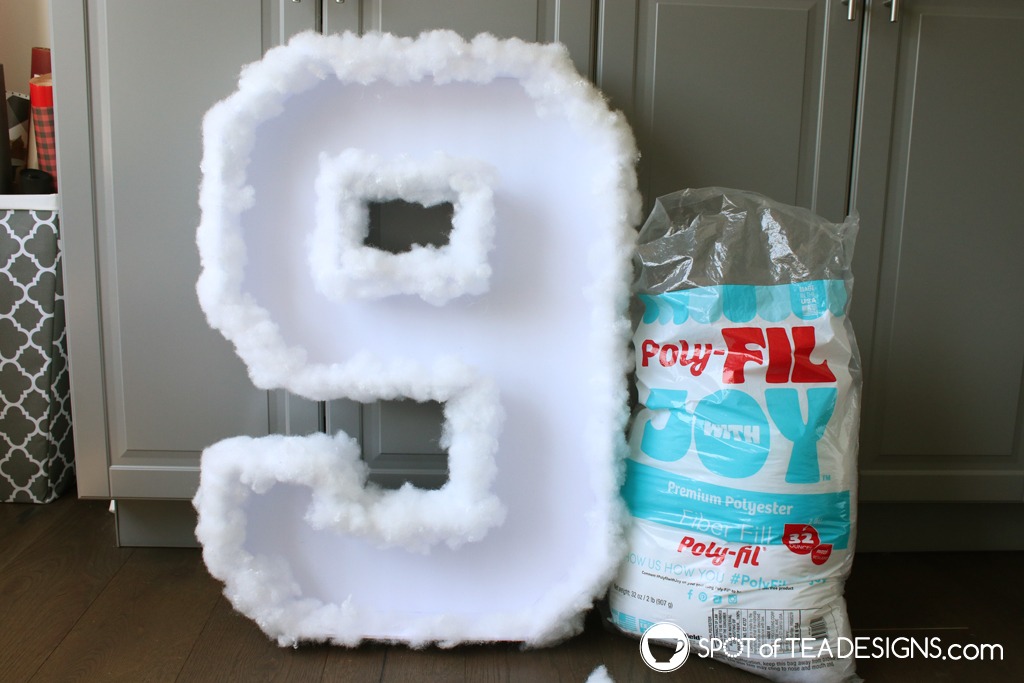
Using hot glue, attach these tufts on the outside edges of the number 9, on all sides except the bottom. This will help it stand once in use.

Now comes the fun part! Craft handfuls of Poly-Fil and stuff it into that 9!
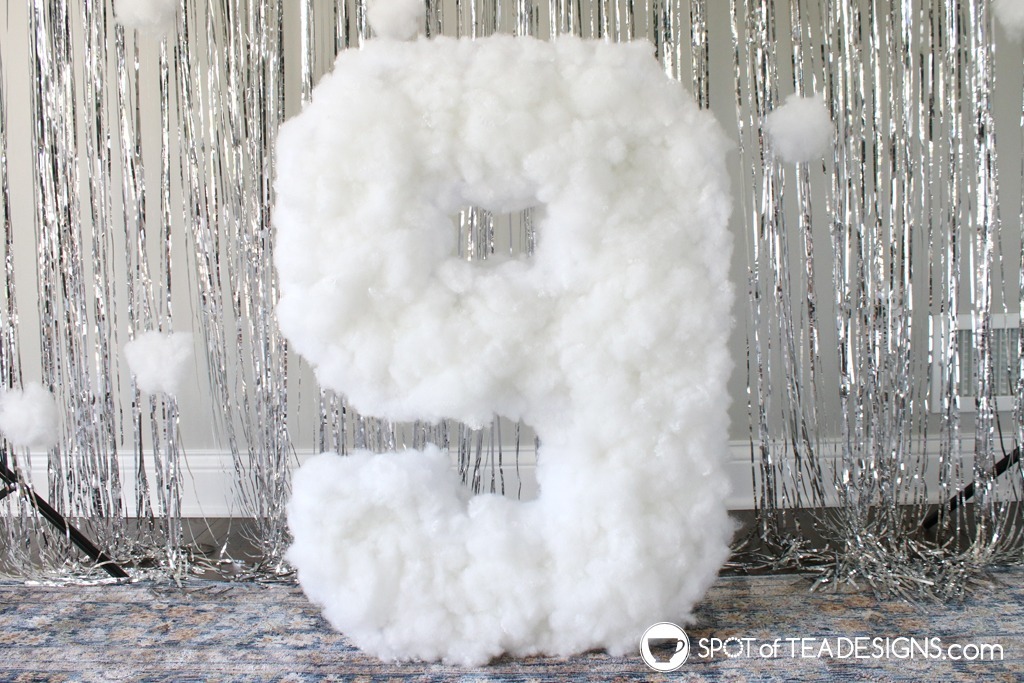
Once filled to the brim you’ll be eager to give that big 9 a fluffy hug! See this large foam number nine in it’s fluffy glory over on my instagram reel!

On party day, stage your #9 on the floor a little further in front of the backdrop design so guests can stand behind it for a memorable photo!

You’ll capture lots of memorable photos using this fun neutral backdrop behind your friends and family.

If you’re looking for a dessert idea to play into this theme, you can create these “On Cloud 9” dessert toppers using my SVG cut file and more fluffy Poly-Fil!
If you recreate this backdrop using my tutorial, I’d love if you’d tag me so I can see your fluffy design!
Related Posts


Leave a Reply