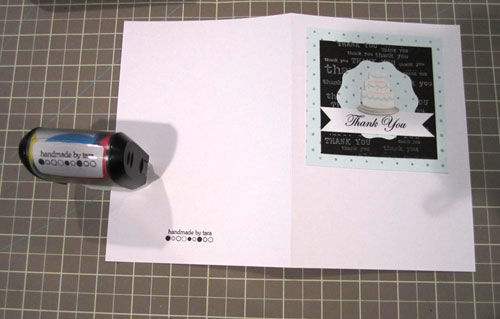
Those who know me personally, will not be surprised to learn that my Thank You cards were the first things I crafted for my wedding! They just seemed so disconnected to me that it was easy to get on board designing them. They didn’t HAVE to match necessarily and they were contingent on some decision I had to make or design. They were just a way to say thank you.

Step 1 to classy: Use embossing techniques. They just seem to step it up a notch when it comes to stamping. I stamped blue cardstock squares with the adorable polka dot stamp in silver pigment ink and black squares with the thank you stamp in white ink. Add white embossing powder on top and heat emboss to glistening gorgeousness!

Step 2: Use your pieces wisely. I used a wavy circle punch inside the blue polka dot piece. Once I put the black thank you piece on top, you could no longer see the hole! Then I added the punched shape on top as an area to put my embellishments.

Step 3. Embellish. I added these adorable Martha Stewart Crafts cake stickers (in blue and white) to the punched shape and a “thank you” phrase I printed and cut into little label designs in 2 fonts.

Step 4. As a final touch, as I do with all my handmade cards, I used my custom “handmade by tara” stamp on the back of the cards. (Vistaprint.com: Rubber Stamp)

At the time I crafted these, I didn’t have anything else to start yet for the wedding so it was nice to be able to check something off the crafting to do list!
(supplies: Punch: EK Tools, Sticker: Martha Stewart Crafts, Stamps: Hero Arts, Embossing Powder: Inkadinkado, Stamp Pads: Color Box, Handmade Stamp: Vistaprint)


Leave a Reply