In October 2009, Frank and Lauren (my new in-laws) bought a new, gorgeous 4 bedroom home and immediately started their life together as a couple (he popped the question that day!). As this was new construction, there wasn’t any established lawn space in the front or back yard. After getting married, F&L decided to focus on the home’s exterior to go along with their beautiful interior.
Follow along to see the process on how they made over their backyard to the fun entertainment space it is today!
Fall 2011


Here is the bare bones backyard. Prior to these photos, a sprinkler system was installed and a large shed was purchased to accommodate the soon to be, much-needed lawn equipment. It was a blank canvas for Frank to design his ultimate backyard entertainment space!

Off the kitchen space was a straight set of stairs that led to a small patio setting and eventually onto an open grassy area. But this backyard space did not lend itself to get togethers or even cooking on their grill!
September 2011

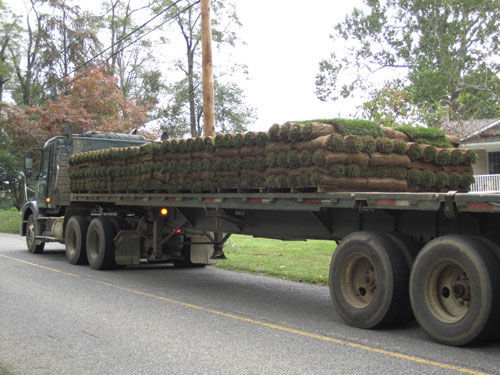
First things first, bring in the sod….a whole lot of it!

After many, MANY man hours unloading the truck and laying out the grass, the backyard was finally taking shape.
April 2012

Behold, the sod took and the backyard welcomed spring with a grassy carpet!

And so began the patio formation and new staircase set up seen here.
Summer 2012
By late summer, Frank finished his patio masterpiece!

Guests could now walk out of his kitchen, down a newly created angled staircase which landed at a new patio platform. This began a new spacious area to keep his grill.

From here, you can walk down to a large open area with seating for 10 and a firepit with a large built in stone seat!

Beyond that is a large, round patio area, which may eventually house a hot tub!
Details:
Brick type: EP Henry – Hickory (color)
Stairs type: Trex – Rope Swing (color)
Related Posts


Looks great now but boy was that exhausting to complete. Thanks for following our progress. :)